Hello crafty friends!I can’t believe it is already March. The year is already flying by.If you arrived here from the Pear Blossom Press Blog, welcome.Today, I used the fun One Light from Pear Blossom Press for a great birthday card.We just had a collaboration with Picket Fence Studios, so I grabbed those products to create another birthday card.
ALL SUPPLIES ARE LISTED BELOW!!
First, I created a panel using the What’s Your Sign Stencil from Picket Fence Studios. I used Catherine Pooler ink in Pink Champagne and Be Mine.I used a Pint Size Paper Pouncer to pounce my ink on with the stencil.I then used the Notched Corners Die Set from Pink and Main to die cut this panel.
I next used a Pint Size Paper Pouncer and Fiesta Blue Catherine Pooler Ink to color the edges (I went in about an inch) of an A2 piece of white cardstock.I love that this matched my cake stand really well.
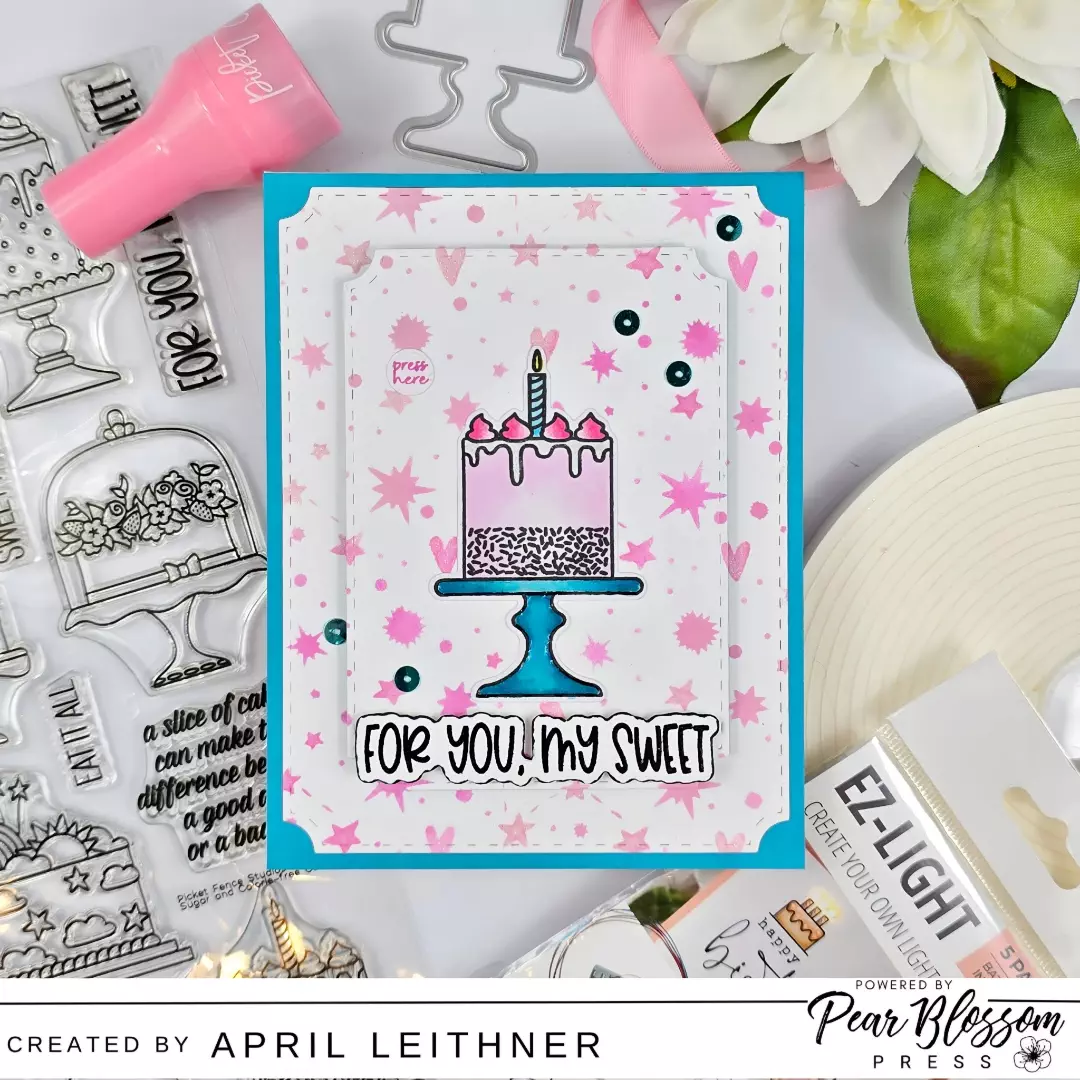
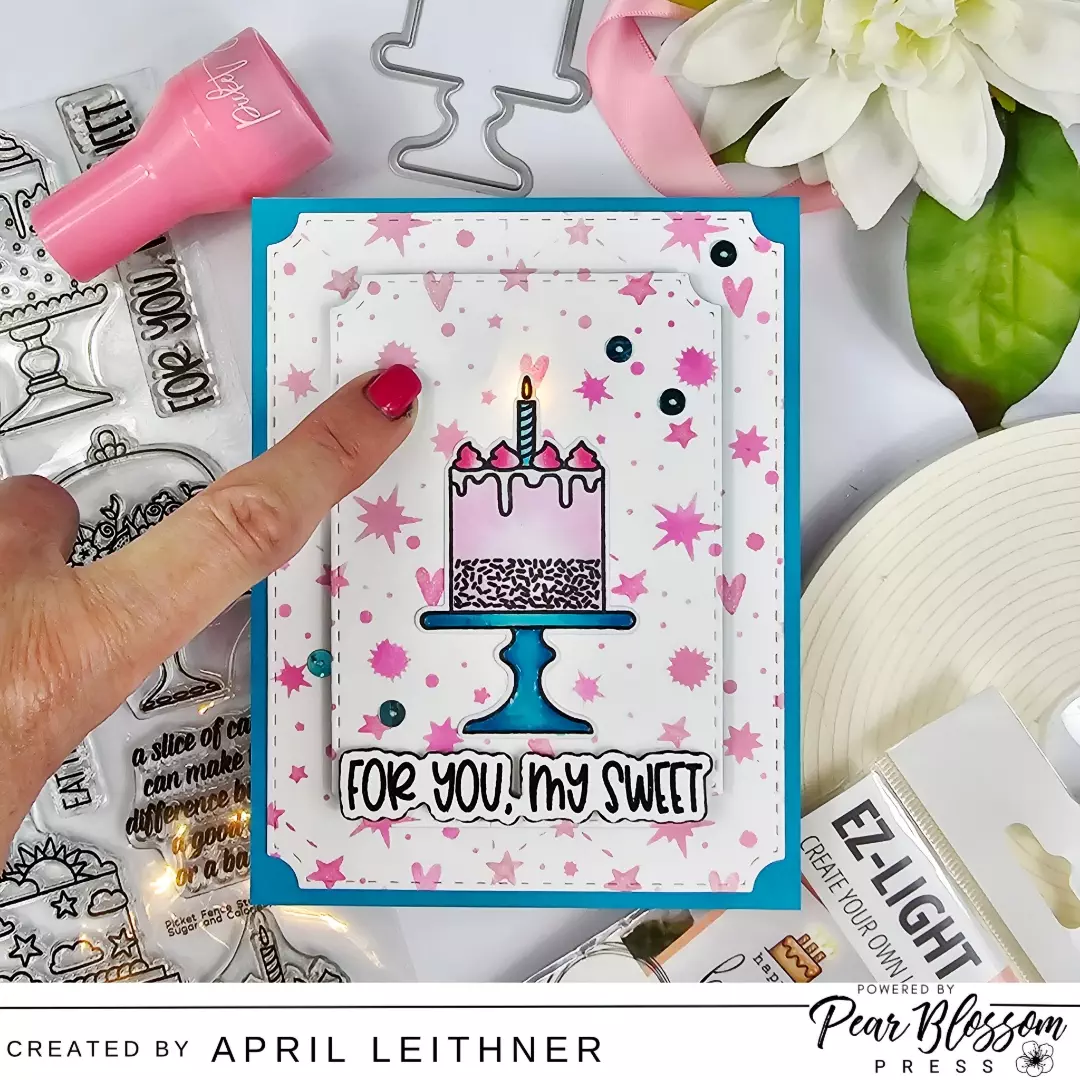
I then stamped the cake image (from the Sugar & Calorie Free Stamp Set) with alcohol friendly ink on X Press It Blending Paper.I like this paper for alcohol markers.I am still just learning to use alcohol markers and this paper makes it a bit easier for me.I colored my cake image with Olo Markers as follows:BG 0.4 0.7 Zero (cake stand), RV 0.1 0.2 0.4 (cake and frosting), C-G 0 and 1 (dripped frosting), BG 0.4 Zero (candle), and Y 2.3 (candle flame).I then used the coordinating dies and die cut this image.
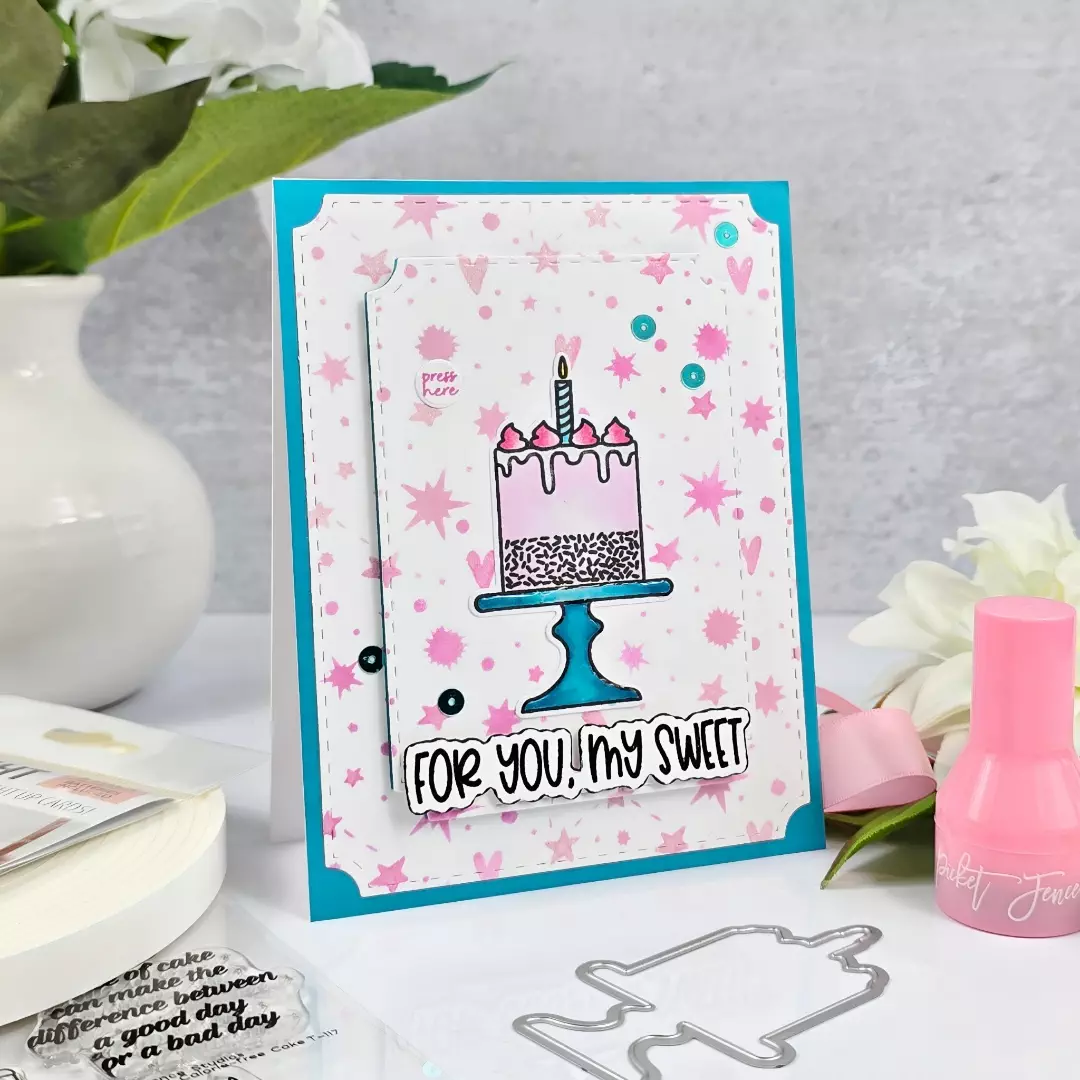
Next, I used a smaller Notched Corners Die to cut in the center of the one I die cut earlier using the stenciled panel.I adhered my cake to the center of this smaller panel.I flipped this panel over and figured out the placement for the One Light.I marked on the front where the battery pack button would be.I created a press here with the PB Press Stamp and Die Bundle.I stamped press here in Be Mine Ink and die cut with a circle die in the bundle.


I then added World’s Greatest Foam Tape around the One Light and the panel.I adhered the portion of the stenciled image we die cut our smaller Notched Corner Die from to the blue edged panel.Then I removed the release paper from the foam tape and popped it up in the center of this.I love that I went in far enough with the Fiesta Blue when I was pouncing that you can see it from the sides with this center section popped up.I then adhered my press here circle in place and I love how the candle lights up.

I heat embossed a sentiment using black pigment ink and clear embossing powder.Then I used the coordinating dies to die cut the sentiment out and edged the sentiment with a black alcohol marker.Using a couple Waffle Flower thin foam strips, I popped the sentiment up below the cake.
I finished my card with a sprinkling of flat sequins from the Peacock Tails Sequin Mix, added some Glossy Accents to the cake stand and some sparkle to the frosting with a Shimmer Pen.This entire panel was adhered to a top folding heavy weight card base.
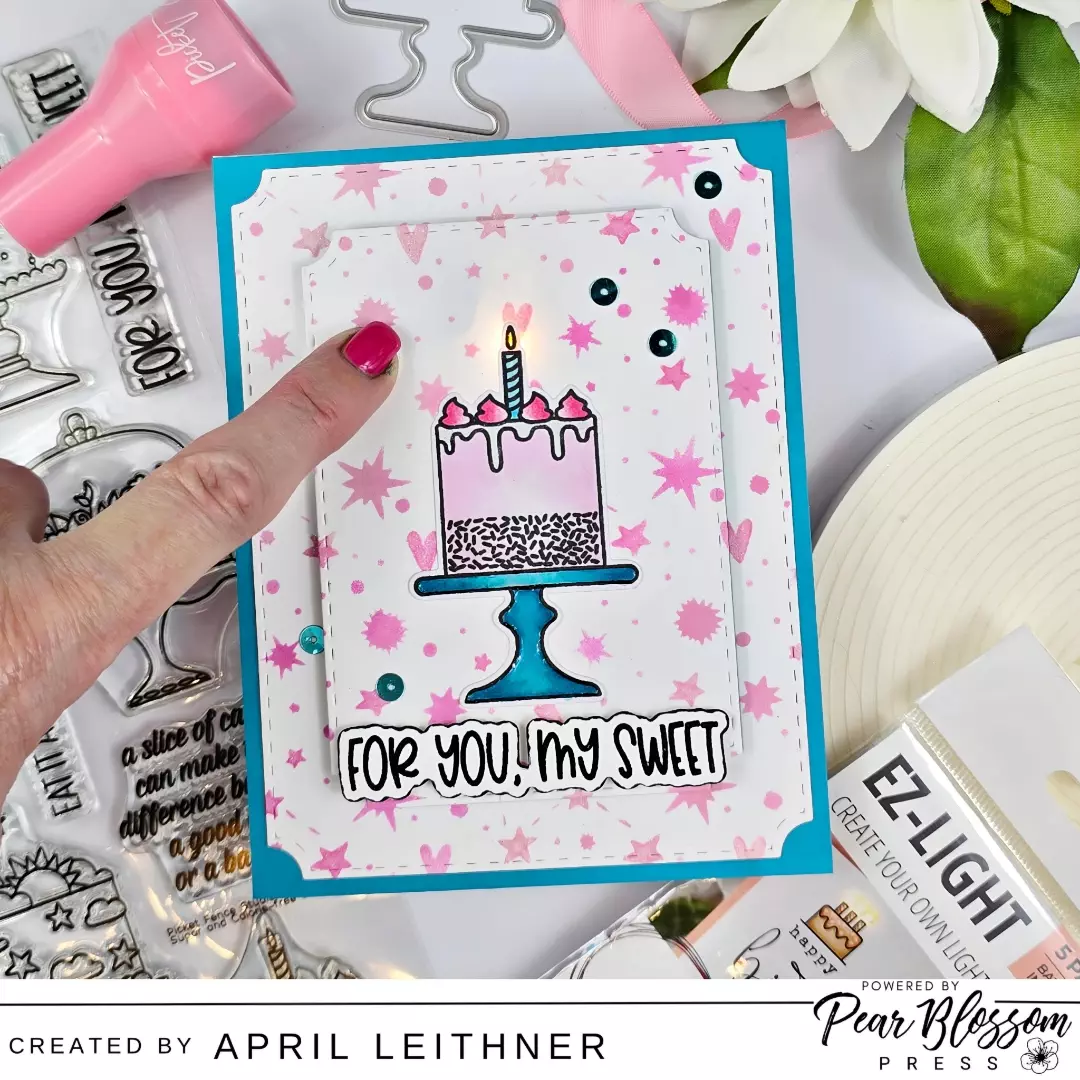
I don’t reach for the One Light often enough.This light is perfect for so many cards and works so great with the single candle on this card.Thanks again, if you came here from the amazing Pear Blossom Press Blog.
Thanks for stopping by, and I will see you next time!
Happy crafting!April
–SUPPLIES–
Glassboard Studios 20% Discount Code INKY20
Glassboard Studios Discount Link https://www.glassboardstudio.com/discount/INKY20

**Affiliate links are used when available at NO EXTRA COST to you! When you use my links to shop, I do receive a small commission which helps me continue to bring you new content. Thank you for your support!**
Test!