Hi crafty friends!I hope everyone is excited for 2024 and had a wonderful holiday season.With Christmas just being over and lots of parties being attended for the holidays, I am busy making thank you cards.I am up on the Pear Blossom Press Blog (Welcome, if you came from there!) with this Twinkle Lights card.These lights are amazing and look so good with snowflakes.
Watch to see these amazing Twinkle Lights in action!
ALL SUPPLIES ARE LISTED BELOW!!
First, I die cut the Fancy Flakes Cover Die from Honey Bee Stamps out of some teal foil cardstock that I had in my stash. I then placed the detail Fancy Flakes Cover Die is place and ran it through my die cut machine to add the piercing detail to the snowflakes. I adhered this with liquid glue over a 4.25×5.5″ piece of glitter cardstock from Memory Box.I then used a hole punch to create holes in the center of three snowflakes.I picked three large snowflakes that I knew would not be under the large heart.

Next, I used Unchartered Mariner Distress Oxide Ink and went direct to paper with the pad to create a piece of colored cardstock that would match my foil.I didn’t need a very big piece of this.I then heat embossed “PUSH” from the PB Press Stamp & Die Bundle with Wow Disco Ball Embossing Powder.I love the sparkle of this embossing powder.I used a die from Hero Art’s Infinity Hearts Die Set to cut this out.I set this aside while I installed the Twinkle Lights system.
Flipping my snowflake background over, I adhered a 4.25 x 5.5″ of Vellum to the back. I could have used small pieces of vellum over the holes, but I didn’t think about it until after.This will hide the lights when not blinking.I placed the battery in the Twinkle Lights set then taped each of the three lights behind the holes of the snowflakes.I used clear tape to do this.After I determined where I wanted the button to turn on my lights, I used the World’s Best Foam Tape over the back of the entire panel.I placed it close to my battery pack to hold it in place and also placed it over the wires (but not the lights).I am also very generous with my Foam Tape as I don’t want anything to shift.


I flipped my card panel over and made sure I placed the “PUSH” heart directly over the button to turn my lights on. I adhered it with liquid adhesive.
Next, I created the other elements for my card.Using the Snow Love Stamp Set , I stamped the heart image with silver ink ( I used an older ink I have had forever, but any silver metallic pigment ink you have will work). I then sprinkled more of the Wow Disco Ball Embossing Powder over the image and heat set it.This embossing powder has glitter in it, so I suggest heat embossing from the back of the image so the glitter doesn’t blow off while using your heat tool.Since I don’t have coordinating dies for this set, I fussy cut the heart out.

I grabbed Unchartered Mariner Oxide Ink (as it stays wet longer and works great for heat embossing) and stamped a sentiment from the Snow Love Stamp Set.I once again used the Wow Disco Ball Embossing Powder.This was cut down into a sentiment strip using a paper trimmer.
Using Foam Squares, I popped up this heart in the center of the card.Before popping up the sentiment.I took my Unchartered Mariner Ink Pad and added ink just on the edges of the sentiment strip.I like this little detail as it helps to define a sentiment like this.I then used Thin Foam Squares and popped up the sentiment over the heart.
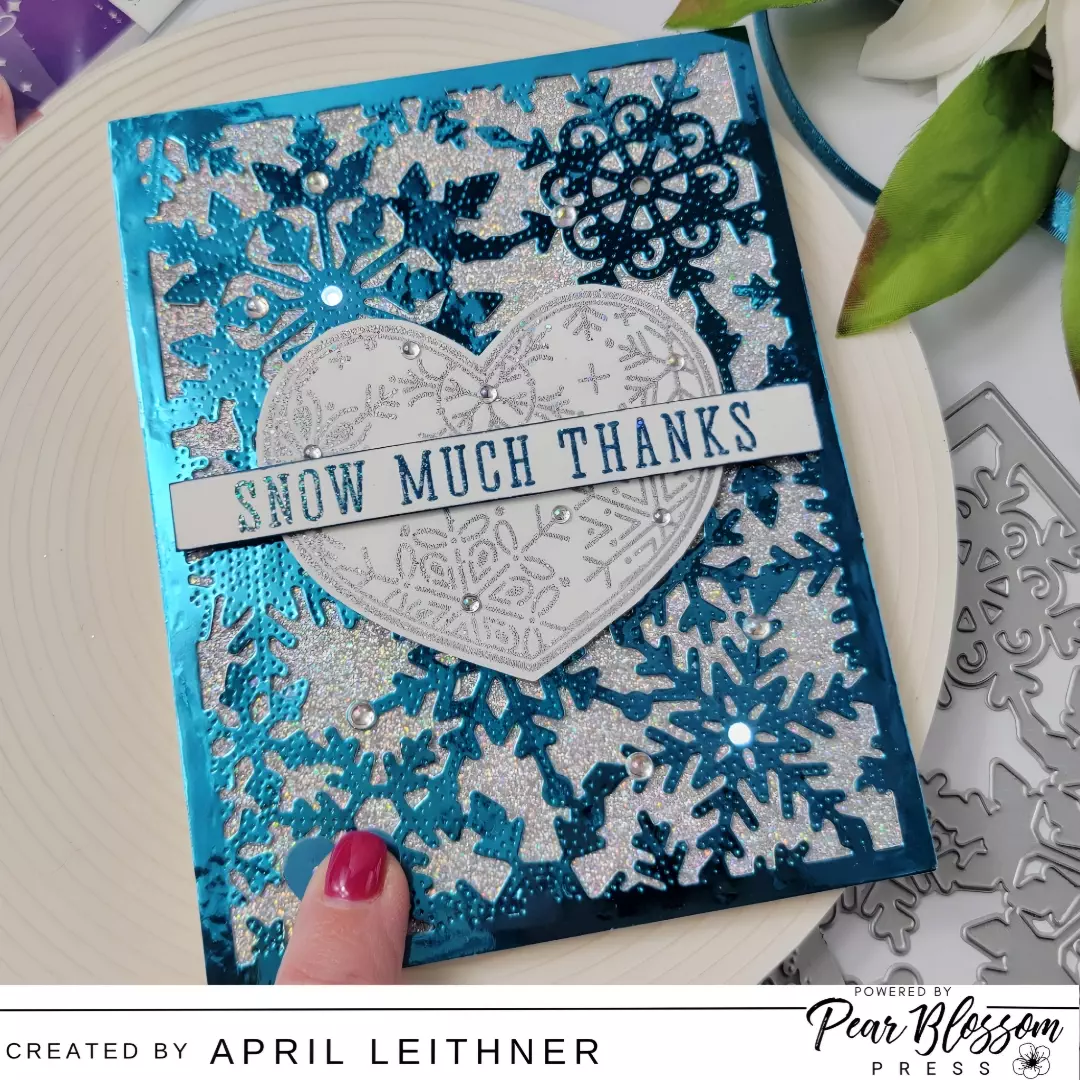
I added a few Iridescent Drops from Pink Fresh Studio around the card for a little added bling. Using liquid adhesive, I added my panel to a heavy weight top folding card base.
I love all the shine on this card and the Twinkle Lights set really makes this card come to life.Make sure to head over to the Pear Blossom Press Blog (if you didn’t come from there) and check it out.Thank you so much for stopping by and I will see you next time.Happy crafting!April
–SUPPLIES–

**Affiliate links are used when available at NO EXTRA COST to you!I appreciate your support so very much.Thank you!!**