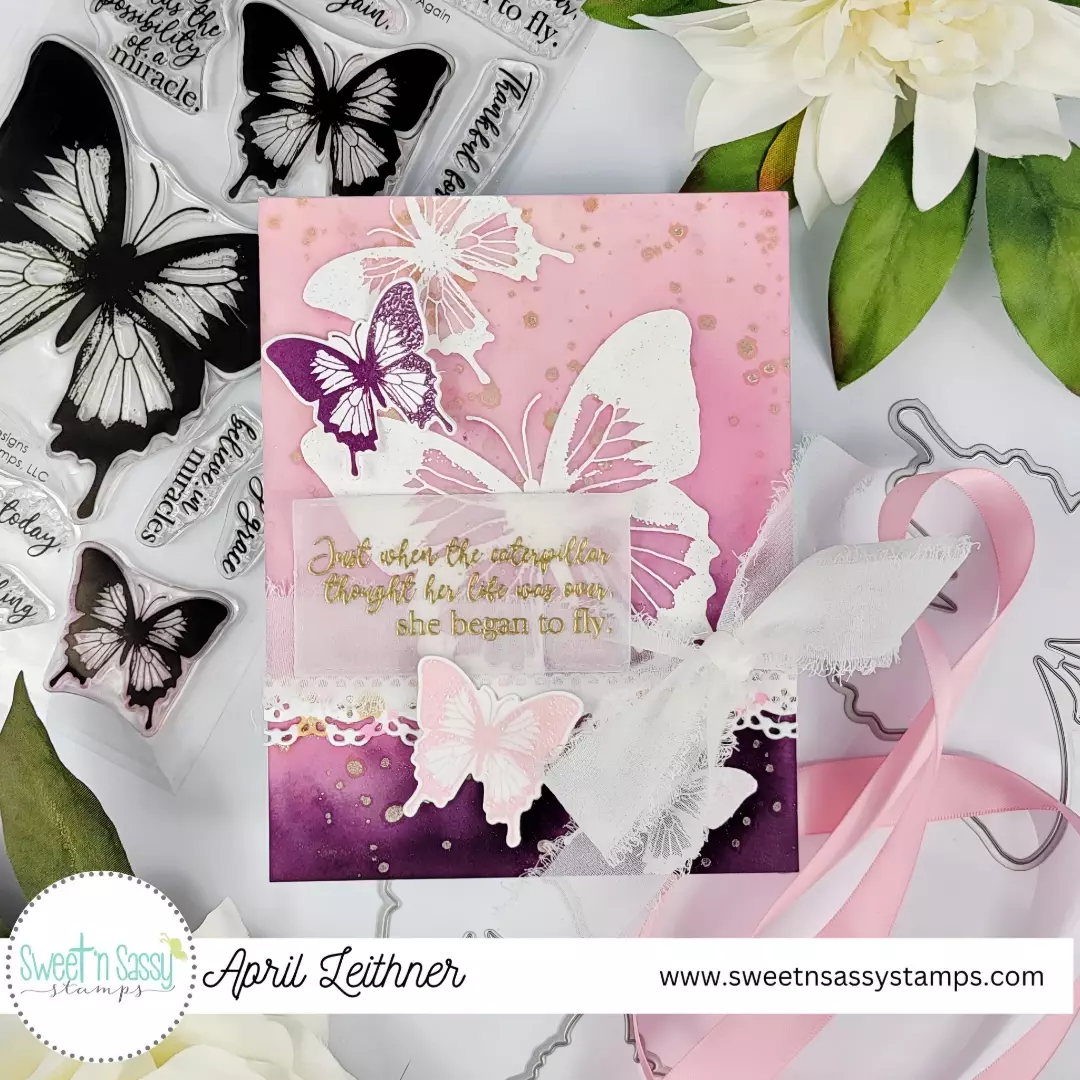
Hi crafty friends!Creating background panels is my favorite part of making a card.The background sets the mood and feel for a card.I love all background techniques, but my current favorite is ink sprays.The Distress Spray Stains, Oxide Sprays and Mica Sprays are stunning and there are so many color choices.
For this card I used the gorgeous Begin Again Stamp Set and Dies from Sweet ‘n Sassy Stamps.These butterflies are beautiful and worked perfectly with my background.
ALL SUPPLIES ARE LISTED BELOW!!
First, I created the background panel.This is where I usually always begin when creating a card.I grabbed Distress Spray Stains in Spun Sugar, Kitsch Flamingo and Seedless Preserves.I used my Distress Sprayer which I have filled with water to spray an A2 piece of Distress Mixed Media Cardstock.Then I sprayed the three colors on the cardstock starting with Spun Sugar at the top, then Kitsch Flamingo and finally Seedless Preserves at the bottom of the panel.I do use my hand (I don’t mind getting inky) to shield the lighter colors from the darker as I spray or spatter.I tilted the cardstock so the lighter colors ran into the lighter as I dried it with a Heat It tool.I did this several times, then spattered the pigment on using the spray nozzle tube from each color.I added layers, drying between them until I was happy with the background.
Once my background was completely dry, I used the nozzle to spatter on some Unravelled Mica Spray Stain.
When the background was dry , I used an antistatic tool on it before stamping the butterflies in Unicorn White Pigment Ink.I then heat embossed the images with Wow Opaque Bright White Super Fine Embossing Powder.
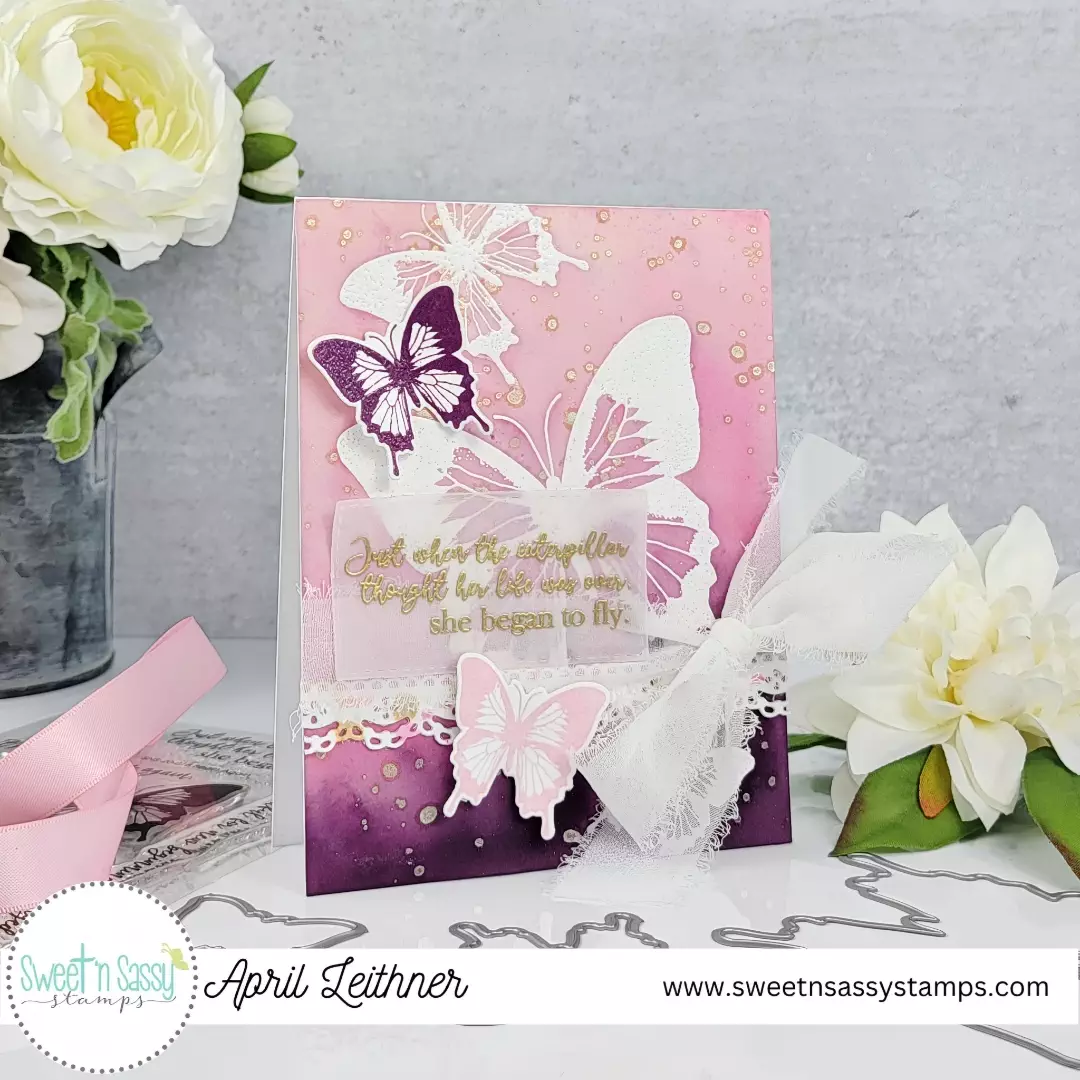
I stamped two small butterflies from the Begin Again Stamp Set in Spun Sugar and Seedless Preserves Oxide Ink and heat embossed using clear embossing powder.I love that Oxide Ink stays wet long enough to heat emboss with it. I used the coordinated dies to die cut out the small butterflies.
Next, I created a border using a die from the Doily Borders Die Set.I cut this down to 4.25″ and spattered on some Spun Sugar and Kitsch Flamingo Spray Stain.I also spattered on some of the Unravelled Mica Spray Stain. I adhered this toward the bottom portion of the background panel. I wrapped some white ribbon around the panel directly above this border and tied a bow to one side.
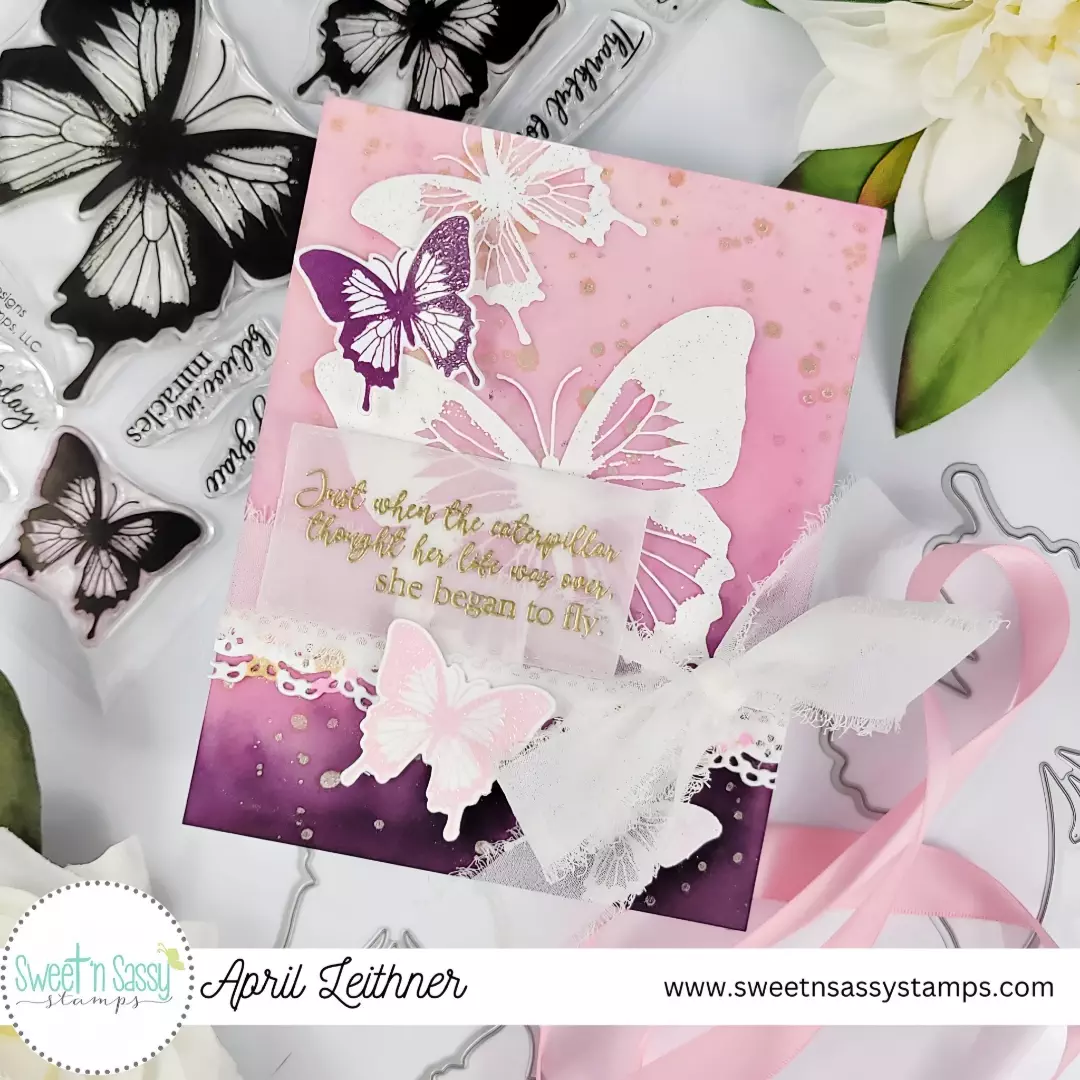
I created my sentiment by heat embossing with Gilded Embossing Powder on Vellum.I then die cut it out using a smaller die from the Stitched Rectangle Die Set.I like to adhere Vellum by using my Xyron Sticker Maker (at least those images that fit) as I find the adhesive doesn’t show this way.I placed the sentiment over the ribbon above the border.I put a little anti static powder (to take the sticky away) around the edges of the sentiment as I wanted it to not lie perfectly flat.
Using foam squares and liquid adhesive, I adhered the two die cut butterflies to the card.I use the foam squares under the wings and adhere the body directly to the card.This keeps the wings up and makes the butterflies appear to be in flight.
Lastly, I adhered the entire panel to a top folding heavy weight card base.

This is one of my favorites cards that I have made recently.If you haven’t tried creating backgrounds with ink sprays, I highly recommend it.It is a process that takes times as all the layers help to build dimension.I always think the finished product is worth the time.Thank you so much for stopping by, and I will see you next time!
Happy crafting!April
–SUPPLIES–
Glassboard Studios 20% Discount Code INKY20
Glassboard Studios Discount Link https://www.glassboardstudio.com/discount/INKY20

**Affiliate links are used when available at NO EXTRA COST to you! When you use my links to shop, I do receive a small commission which helps me continue to bring you new content. Thank you for your support!**