Hi Crafty Friends! We have had a busy week with the grandbaby here the last couple days so I am off my schedule a bit. However, I have a super fun slimline card for you today featuring the Large Die of the Month: Kaleidoscope Floral Slimline set. I love the look of slimline cards but I do not make them often enough. I love that this set has tons of extra floral dies that can be used independently of the large slimline die. Die cutting is very therapeutic for me. I can really get into listening to a podcast and just die cut tons of images. I always die cut way more than I need and I just put all those extras in the storage pocket with my dies to use for a later project.
Spellbinders has great club kits that you receive monthly. I get four of their club kits and love each one. Make sure to check them all out as they have a large variety of kits to choose from or you can choose to get them them all.

Supplies used:
- Kaleidoscope Floral Slimline (Large Die of the Month) – Spellbinders
- Outline Sentiments (Small Die of the Month) – Spellbinders
- Wild Berry Essentials Cardstock – Spellbinders
- Dahlia Essentials Cardstock – Spellbinders
- Pink Sand Essentials Cardstock – Spellbinders
- Beeswax Essentials Cardstock – Spellbinders
- Fern Essentials Cardstock – Spellbinders
- Matte Gold Cardstock – Simon Says Stamp
- Jet Black Cardstock – Altenew
- Birthday Reverse Sentiments – Simon Says Stamp
- Glorious Golden Baubles – Trinity Stamps
- Platinum 6 Die Cutting Machine – Spellbinders
This card has some die cut inlay as well as the beautiful individual flowers that add some dimension. I thought about having green for my large die cut image but I love that I went the gold as it really makes the colored cardstock pop.
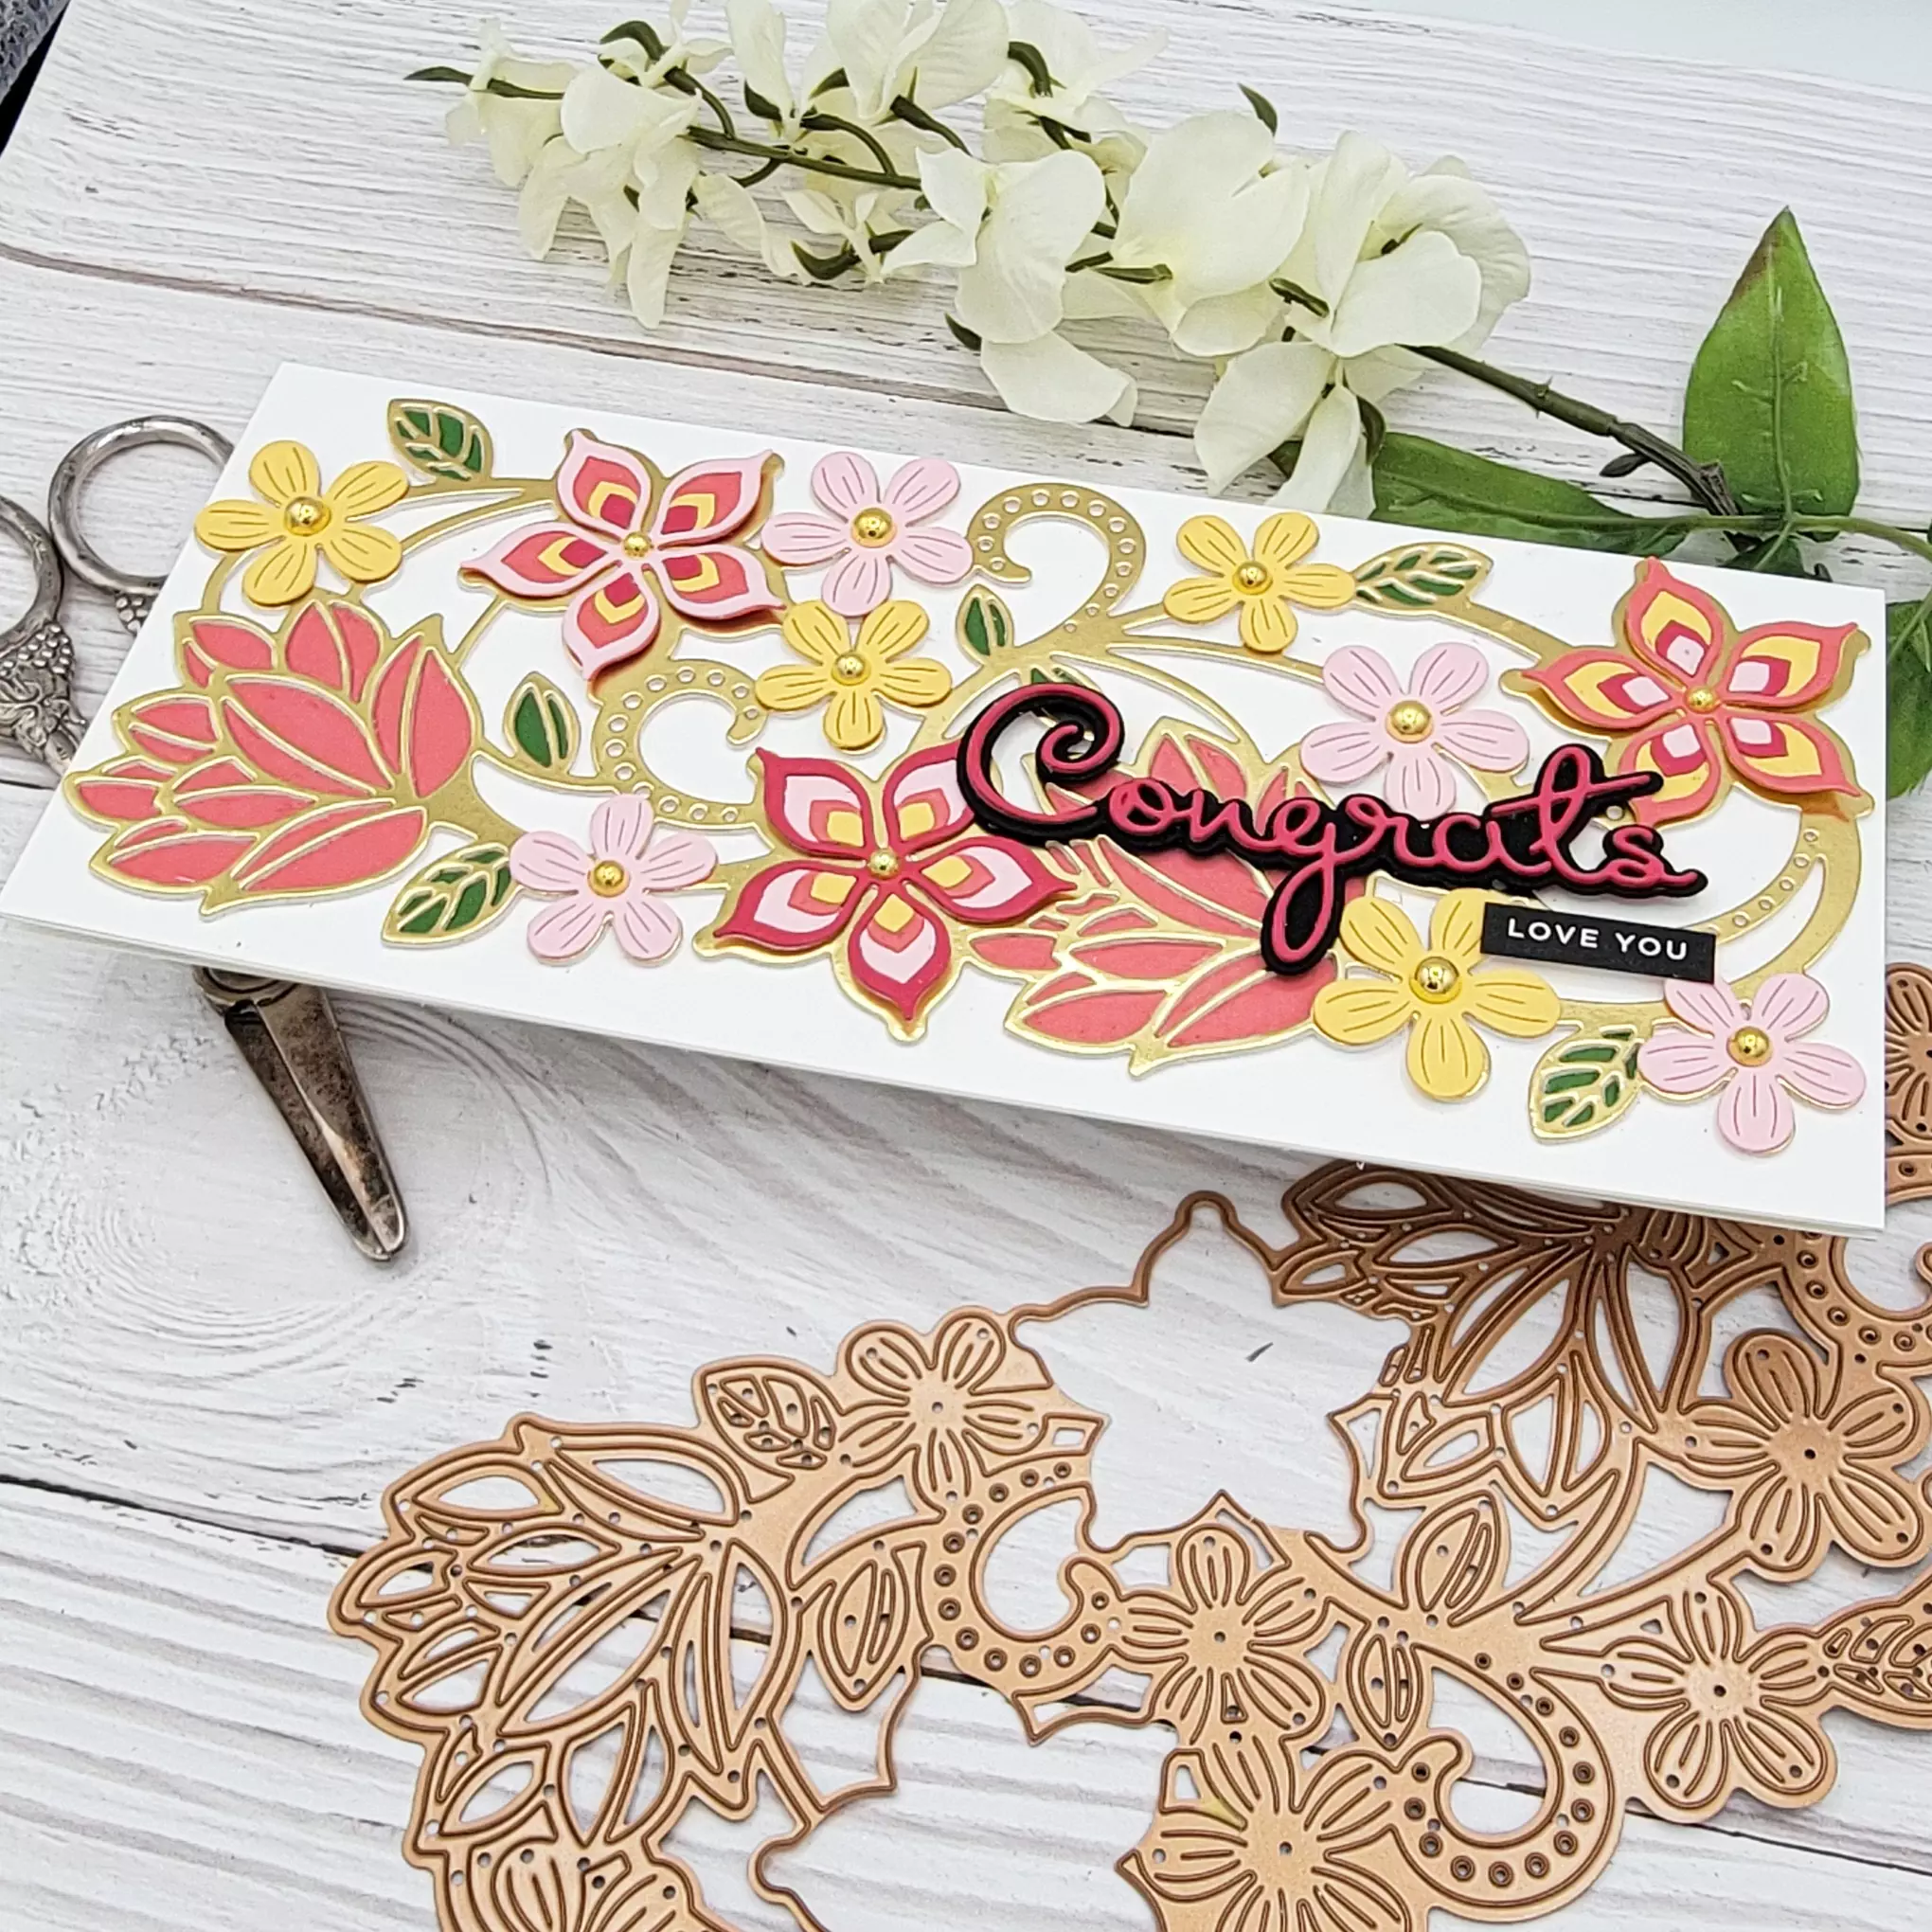
- First I die cut the large die from the Kaleidoscope Floral Slimline set using Matte Gold Cardstock. I then cut two more from heavy weight white cardstock. I adhered these together with liquid adhesive. This is a fast and simple way to add dimension to a die cut without trying to cut very thin pieces of foam tape.
- I then cut pieces of the Dahlia and Fern into pieces that covered the areas I wanted to inlay with the large die. No need to waste cardstock and cut the entire image just to get these areas cut. I just hold the cardstock into place using some low tack tape. Then rub it through my die cut machine.
- I die cut the large layered flower from Wild Berry, Dahlia, Pink Sand and Beeswax Essentials Cardstock. I then layered these together with liquid adhesive. I did have one flower from this that I did not use.
- Next, I die cut the other flowers from Pink Sand and Beeswax Cardstock.
- Now that I have all the images for the large image die cut, I began assembling this part of the card. I adhered the gold background piece to a heavy weight slimline card base.

- Then I inlaid the 2 large flowers and all the leaves. I used liquid adhesive to hold them in place and careful pushed them down into place with a craft pick. A stylus would work great for this as well.
- I adhered the Beeswax and Pink Sand flowers in place as well as the larger layered floral images to the background die.
- Then I added Gold Baubles to the center of those flowers.
- Next, I die cut my sentiment from the Outline Sentiments set. I cut the shadow from Jet Black cardstock and three of the Congrats from Wild Berry cardstock. I then layered my Congrats with liquid adhesive before placing on the shadow piece.
- I arranged this in the lower right hand corner and glued in place.
- I placed a small sub sentiment below that.

I think this card is very elegant and eye catching. I hope you are inspired to get your die cut machine out and try some die cut therapy. Thank you so much for stopping by. I appreciate each of you very much.
**Affiliate links may be used at NO EXTRA COST to you. Thank you for your support as this helps me to keep bringing you new content.